This is the second part of the Blimpduino presentation, the first one was a simple introduction and below you can read about the actual build. The procedure is pretty straight-forward with only a few tricky points and some need for improvisation. All the basic instructions are in the
Blimpduino page on DIYdrones and you should read and check them before starting the assembly just to be sure you have everything needed and that you have a general view of how things should go.
Read more ..
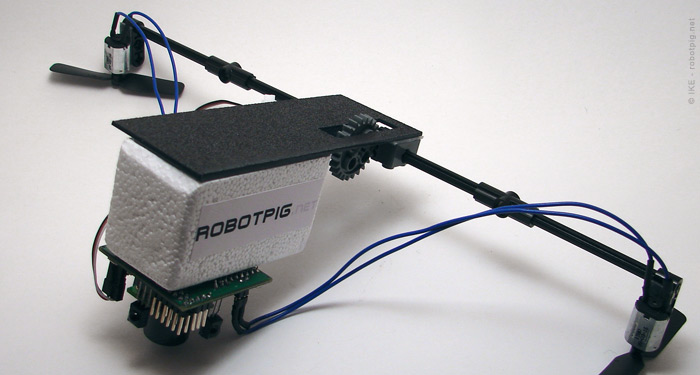
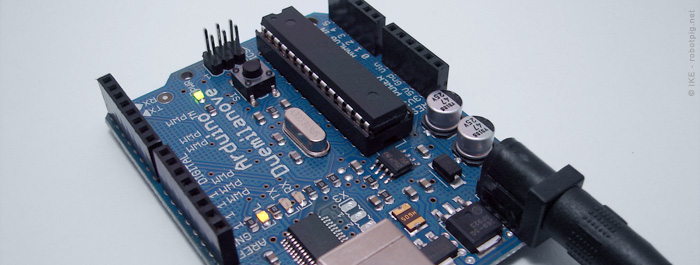
After many introductory posts the time has come for an actual UAV post, the first part of my Blimpduino log. Blimpduino is a robotic blimp developed by Chris Anderson and Jordi Munoz of DIYdrones. Its design is fully open source, in
blimpduino.com you can find all the information, schematics and parts list if you want to make your own from scratch. Of course you can buy the kit with all the necessary parts directly from the
DIYdrones store or from the
makershed store. The Blimpduino uses a Arduino based microcontroller and can be optionally be directly remote-controlled. It has two propellers in a common shaft that can be tilted via a small servo, 4 perimetrically placed IR sensors that detect signal from a separate beacon and an ultrasonic sensor facing downwards to measure altitude.
It has 3 modes of operating. The simpler one is altitude hold, you just switch it on, it measures the altitude with an ultrasonic sensor and tries to maintain it. The autonomous mode uses also the IR sensors to detect where the beacon is and go to it. Finally, you can connect a Radio control receiver and pilot it directly.
Read more ..
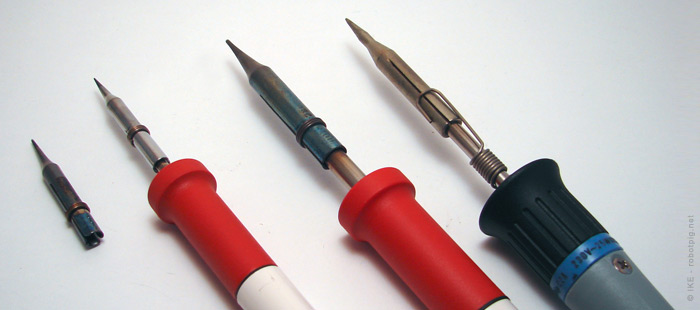
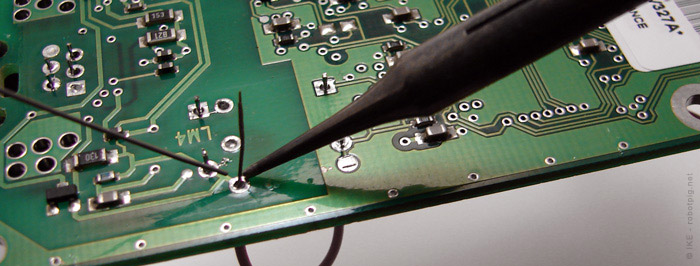
Some time ago in my second post here I mentioned the selection of soldering irons I used. Then I thought the a small iron of 11W with the thinnest tip I could find would be perfect for soldering small and tightly packaged parts. It seems logical enough and soldering through damaged PCBs for practice it was ok. However while building the Mintyboost kit I noticed that the small 11W gun took a very long time to heat the soldering wire and it could fry the part or make a bad weld.
Read more ..

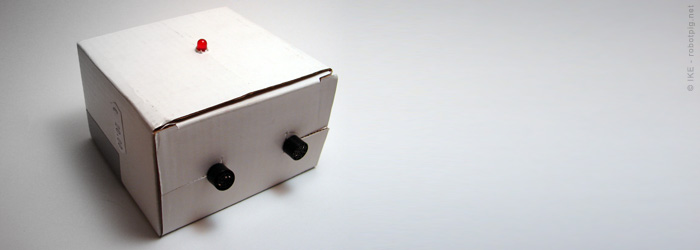
By now you should have figured out that this blog would take a little time until a real UAV will appear. The goal however is still there and along with some electronic parts I order a small electronics kit, the famous
Mintyboost from Adafruit. This is a USB charger that uses two AA batteries and it fits inside a Altoids tin mints box. The goal is firstly to check my soldering skills in a simple but tightly packaged PCB and secondary to have a usefull usb charger for my mobile phone and for whatever similar device (ex GPS).
Read more ..

What you see above is a bar chart that shows the variation in brightness on the screen of a mobile phone playing a video clip.It is also my first successful attempt to visualize data streaming from an Arduino board in real time. The graph is made with Processing, a very powerful and easy multimedia programming environment. Read below for more details and the actual scripts.
Read more ..
Arduino is for open source hardware what Linux is for open source software. It was developed in Italy from Gianluca Martino, Massimo Banzi, and David Cuartielles and its popularity is growing all the time. The Arduino platform is the hardware, a small PCB and also the accompanying software, you can find all the details in their website,
Arduino.cc. It is a programmable micro-computer which can perform many tasks connected with sensors or other components. Everything, from the software to the eagle files of the board schematics are freely available to anyone. Many small or bigger companies have produced arduino based boards or devices. If you are interested in the history of Arduino and open source hardware you can read this very good
article from WIRED where I also first learn about it.
Read more ..
Many years ago I bought a kit from smart electronics, it was the 1049 ultrasonic radar kit, which works similar to a car alarm system. After I bought it, it was forgotten in its box for about 10 years until I found it recently. I thought it was a good way to practice soldering after cannibalizing many unfortunate old devices. The smart kit contains all necessary parts and the (labeled) PCB with some very basic instructions. You just have to solder the parts and trim where necessary.
Read more ..
After the post about the basic tools here there is some basic (always!) tips about soldering. Before the actual soldering, a book that helped me a lot and as you can see from its title it is quite self-explanatory is
"Electronics for dummies" by Gordon McComb and Earl Boysen. It has the basic theory, the essential charts for every part, tutorials for selecting and buying the essential tools and equipment, step-by-step instructions and projects. It is a must read if you are starting from scratch and even if you are experienced it will probably be useful at some point and it isn't expensive.
Read more ..
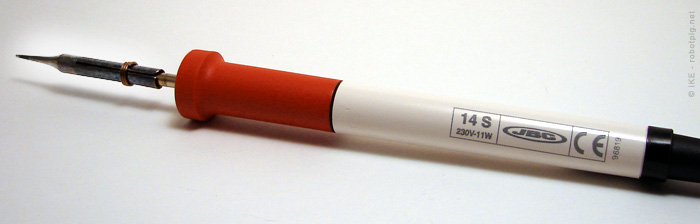
This post is about the basic tools and equipment for soldering (and desoldering) electronic components. The most essential tool is of course a soldering iron. I already had an 26W iron and although with experience one can use it effectively a small diameter 11w is the next best thing to an expensive soldering station. This one is a JBC 14S 11W and it cost me around 40 euros .
Read more ..