After many introductory posts the time has come for an actual UAV post, the first part of my Blimpduino log. Blimpduino is a robotic blimp developed by Chris Anderson and Jordi Munoz of DIYdrones. Its design is fully open source, in blimpduino.com you can find all the information, schematics and parts list if you want to make your own from scratch. Of course you can buy the kit with all the necessary parts directly from the DIYdrones store or from the makershed store. The Blimpduino uses a Arduino based microcontroller and can be optionally be directly remote-controlled. It has two propellers in a common shaft that can be tilted via a small servo, 4 perimetrically placed IR sensors that detect signal from a separate beacon and an ultrasonic sensor facing downwards to measure altitude.
It has 3 modes of operating. The simpler one is altitude hold, you just switch it on, it measures the altitude with an ultrasonic sensor and tries to maintain it. The autonomous mode uses also the IR sensors to detect where the beacon is and go to it. Finally, you can connect a Radio control receiver and pilot it directly.---
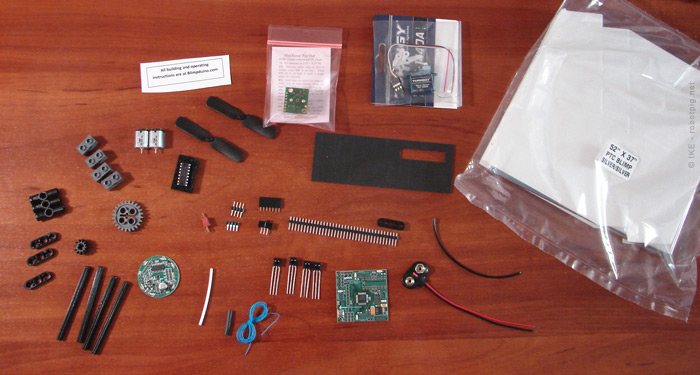
In the photo above you can see the contents of the kit. There is a PCB and some electronic components that need soldering, a simple plastic board used as a frame, the small servo and some Lego parts for the tilting propellers, the props and their motors and finally the Mylar envelope that provides lift when filled with Helium.
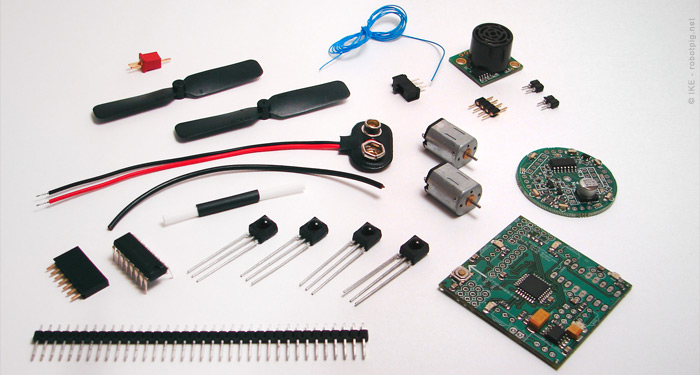
A closer look of the basic components. The blue wire is very thin (30 AWG) and the length provided is just enough. The IR beacon from Pololu as you can see on their website has small IR LEDs and the 4 black receivers. At first I thought that 8 receivers were needed but actually you need only 4 for the blimp, the IR beacon only emits, so it doesn't need the receivers. The battery connector (the red part, top left) isn't very useful, you actually need a JST connector and I think in the kits they are selling now a JST is provided.
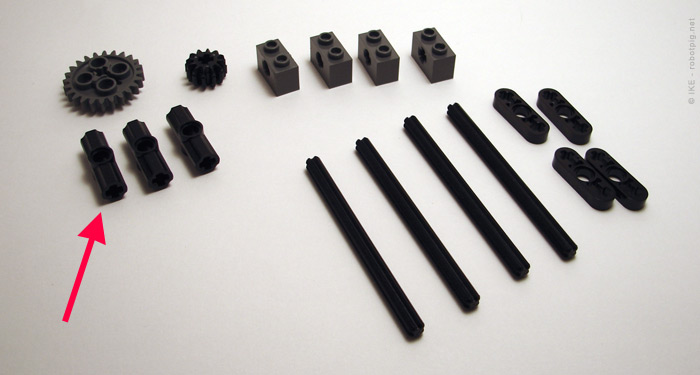
These are the Lego parts (they are indeed original Lego). There was a small problem with my kit, as you can see with the red arrow, it had three identical connectors. Only two of those are needed but you need a simple cylindrical connector to join the shaft in the center near the gear. I had to modify the 3rd one to act as the missing part.
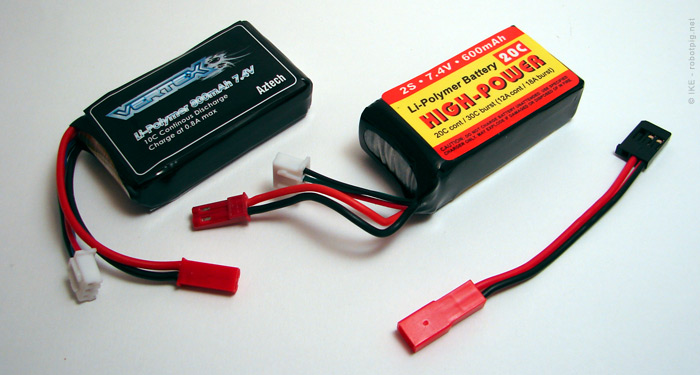
The basic kit needs a few more parts, a battery pack, a replacement JST connector, velcro stickers, double sided sticky tape and of course Helium. I searched several R/C stores and at first bought the black battery on the left which is 800mAh and 10C. It cost me 25 euros and another 20 for the charger from http://www.modelone.gr/. While searching for a JST connector I found another battery that was closer to the specs given from DIYdrones, it gives 600mAh at 20C and it is slightly lighter (a few grams). I bought it from http://www.batteries.gr/ for around 14 euros.
The JST connector was tricky to find, after a lot of research (I should have bought it online) I found the last one in a small RC shop in Athens. You can also use male-female machined pins, it should work just fine although I haven't tried it.
That is my first post for the Blimpduino, the next time I will post the build process and after that the first impressions and first flight.
PS. The first image is a graphic based on the –very good- Blimpduino packaging design.