After the post about the basic tools here there is some basic (always!) tips about soldering. Before the actual soldering, a book that helped me a lot and as you can see from its title it is quite self-explanatory is "Electronics for dummies" by Gordon McComb and Earl Boysen. It has the basic theory, the essential charts for every part, tutorials for selecting and buying the essential tools and equipment, step-by-step instructions and projects. It is a must read if you are starting from scratch and even if you are experienced it will probably be useful at some point and it isn't expensive.---
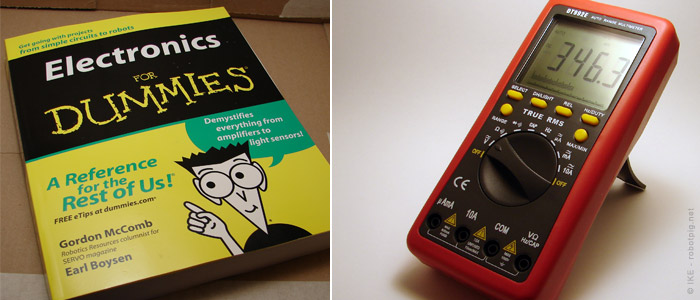
It is also very essential to have a good multimeter, I used as a guide the book mentioned above and I bought the multimeter in the photo, it has many functions (I have used only a small fraction of them) and it is of good quality. It has a very basic manual and the only brand you can see is the DT992E branding, it probably is a generic Chinese multimeter and it cost me 65 euros. You can probably find online a better or cheaper but from my research I think it is good enough.
A multimeter has many uses; the simplest one is to use it for continuity test (to check if current can flow through a connection) or the opposite, for short circuit test. You can measure resistances, capacitors and many other things.
And now, the main theme of the post, how to solder parts. The theory is very simple and you just need practice. You can also find many videos on Youtube and personally I used the instruction of the book mentioned above because before I was using a totally wrong method with dubious results.
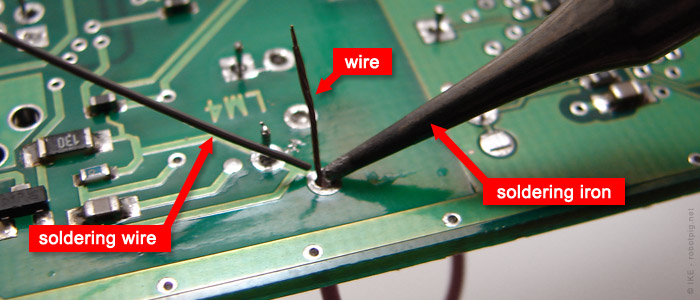
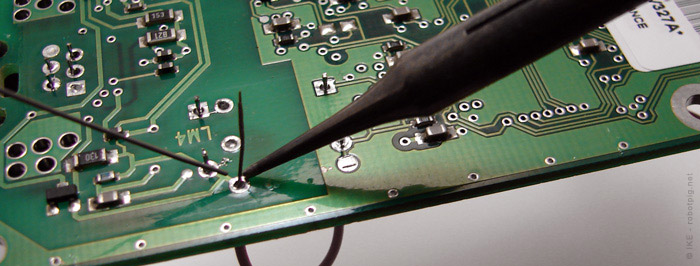
As you can see above firstly you should have a stable PCB, you can use the 3rd hand base for that. You place the part through the hole, here we have a simple wire, in any case either it is a capacitor or a IC you will have a protruding metal wire. It is important that the soldering iron will have reached its maximum temperature. You press the soldering iron tip at the part's wire and then you carefully touch the base where the wire meets the hole on the pcb with the soldering wire. It should melt and form a smooth weld between the pcb and the part. When the weld looks sufficient remove the tip and soldering wire and let it cool. That's it!
For desoldering follow the same steps, place the hot tip to melt the weld, put the vacuum mini-pump as close as you can and release the button to suck the melted wire. That should remove most of it and by gently heat what is left you can remove the part.
Of course it is easier said than done, so you can use old and broken devices (old computer parts, telephones, faxes, cassette players, whatever) for practice. You can remove parts and re solder them. Start with big and scarcely placed parts and with practice you will be able to solder tiny parts very tightly packed.
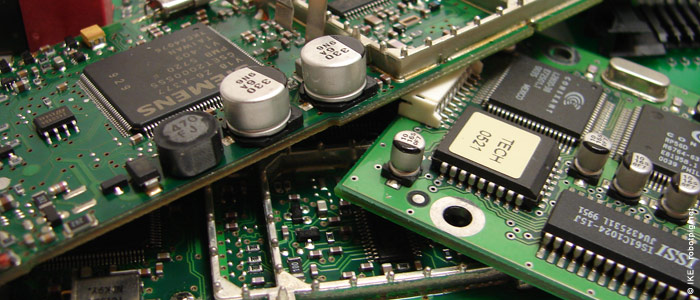
Beside practicing you can salvage useful components from old devices, I recently dismantled an old fax machine and it had many useful parts, 3 electric motors, many LEDs etc.
PS. I would like to than my friend Peter for his useful advice on the subject