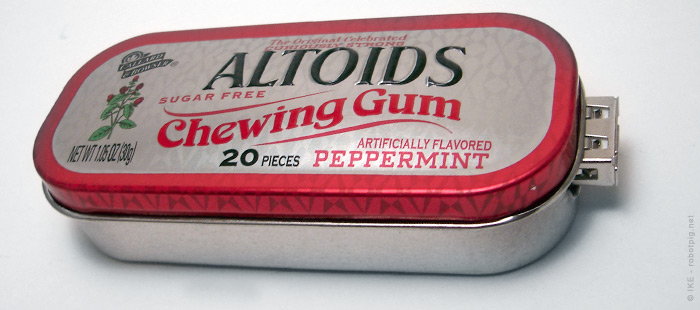
By now you should have figured out that this blog would take a little time until a real UAV will appear. The goal however is still there and along with some electronic parts I order a small electronics kit, the famous Mintyboost from Adafruit. This is a USB charger that uses two AA batteries and it fits inside a Altoids tin mints box. The goal is firstly to check my soldering skills in a simple but tightly packaged PCB and secondary to have a usefull usb charger for my mobile phone and for whatever similar device (ex GPS). ---

In the image above you can see all the contents of the kit. The mints box is sold separately and if you live in a country where it is available you can buy it from anywhere. Here for what I know Altoids aren't imported so I order it from Adafruit. The kit has four resistors and you use two depending on the device you want to charge. I went for the most popular choice with the 100kΩ. You can buy it from the Adafruit website or in other e-stores where it is available. There is also a very well documented website especially for it here and if you want instructions you should read it. This post here is only for describing my experience, it is no substitute for the real thing!
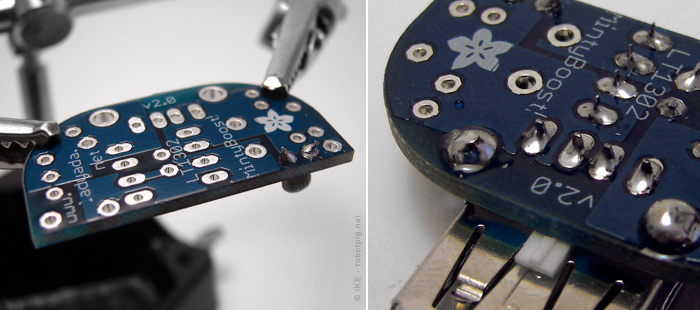
I started soldering the parts following the instructions. I have some problems with my soldering iron because it wasn't hot enough. After I switched to an older bigger one everything went perfectly (more on that on my next post). I examine optically every solder and they seem ok. The only part that needs some extra attention is the small brackets of the usb that hold it in place. You should melt a lot of soldering wire there because it is stressed the most and it should be rigid.
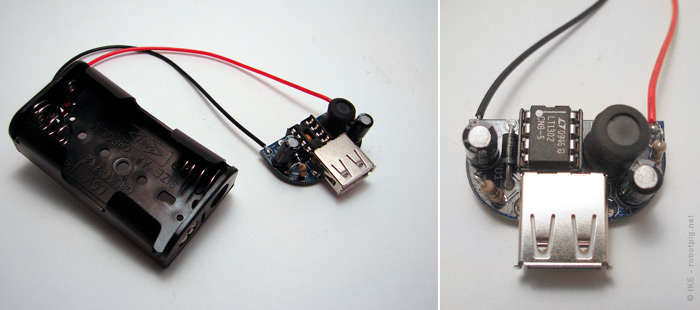
After a while every part is soldered. The kit has a separate socket for the IC to protect it from clumsy installation. It just needs to be snapped in. When everything is in place, I tested the voltage with two AA batteries and great success! There was just above 5 Volts in the usb port!
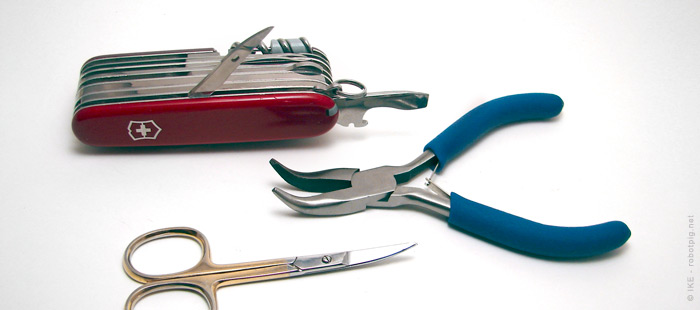
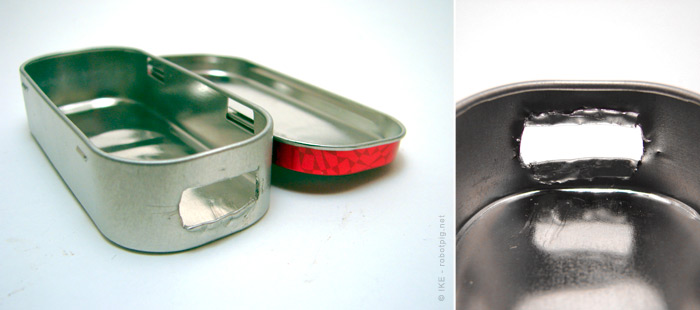
Now the most difficult part, the placement inside the box. I decided to make a square hole without cutting from the top of the tin box. I used the tools above and the swiss army knife was the most helpful. I draw the outline of the usb jack with a pencil and I started by making two small holes. Then I cut through them carefully and after some tweaking and test fittings it was ok.
I placed the double sticky tape, first for the PCB and then for the battery holder and it was finished! You can see it below and also in the very first picture of this post.
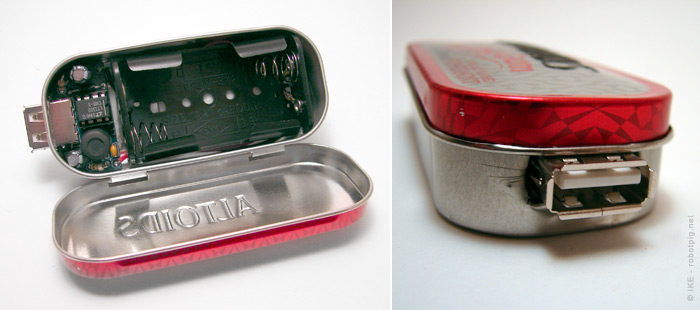
The Mintyboost is a very well designed kit. I used it as a final test in order to have confidence for more complex projects and it was very educative. The most valuable lesson was the use of the bigger soldering iron instead of the small (and as it seems useless) one. So the goal 1 is matched. As mentioned in the mintyboost website it isn’t compatible with everything. I tried with a Nokia N85 mobile phone and it must need a software driver to charge (it doesn't charge with old PCs also), I also tried a small Mp3/4 player and it worked perfectly.
If you want to test your soldering skills, the Mintyboost is perfect. If you want to use it as intended just check the list here (in the bottom) to check if your device is compatible.